This section will describe how to use Intercompany AR for Cash Receipts to apply cash payments to multiple transaction across multiple companies.
Overview of Process Workflow
The typical workflow, once the Intercompany AR for Cash Receipts is installed is as follows:
- Enter sales transactions from a customer into Dynamics GP
- Enter Cash Receipts into GP and post them
- Use ‘Apply Sales Documents’ to select the specific transactions to apply the cash to
- Hit ‘Ok’ to apply the cash across companies
Applying Cash Receipts to Intercompany Sales Documents
This section will describe the exact process used to apple a cash receipt to a sales document in another company.
Before you apply the cash receipt, make sure that you have posted the sales documents in the other companies and additionally that you have posted the cash receipts.
NOTE: You must post the cash receipt before you apply it to sales documents. The Intercompany functionality does not exist from the apply button of the Cash Receipts Entry window.
Once the sales document and the cash receipt have been posted, go to the ‘Apply Sales Documents’ window. Select the customer you wish to apply the cash for and then the document associated with the cash transaction. Once selected, you will see a list of all outstanding transactions. Scroll to the bottom of the list and use the lookup (or enter the company ID) to select the company whose sales transaction you would like the cash applied. A window will appear that will allow you to pick from all transactions in the destination company that are associated with the given customer. Select the given transaction you wish to apply the cash toward and press ‘OK’.
Back in the ‘Apply Sales Documents window, the bottom line will now be filled in with the appropriate information. When you are finished applying the cash you can select ‘OK’. At this point the cash has now been applied to the destination transaction and the due to / from transactions have been created as well.
Example Walkthrough of Process
The first step is to create a transaction in a destination company. In this example, our destination company is called ICP Destination Company. We will create a single transaction in the amount of $1057.08 in the destination company.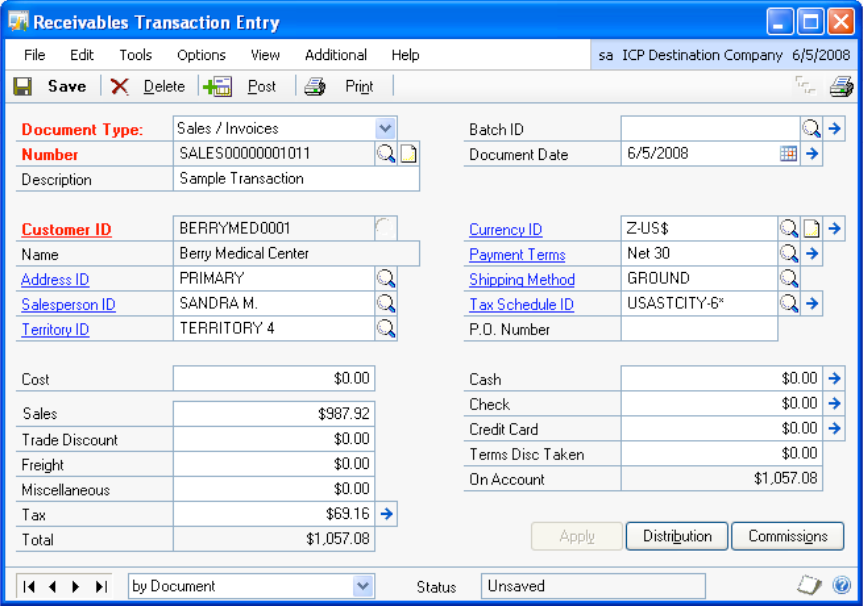
Once the sales transaction has been posted in the destination company, enter a Cash receipt transaction in the source (originating) company. In this example, Fabrikam will act as our source company.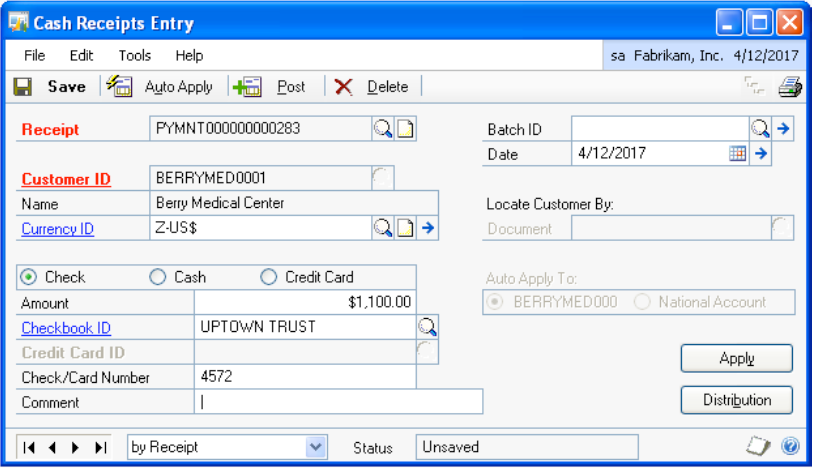
After both the sales document and the cash receipt have posted, navigate to the ‘Apply Sales Documents’. Select the Customer whose cash you would like to apply and then select the specific cash document you would like to apply. Once you have selected those, you should see a window like the following: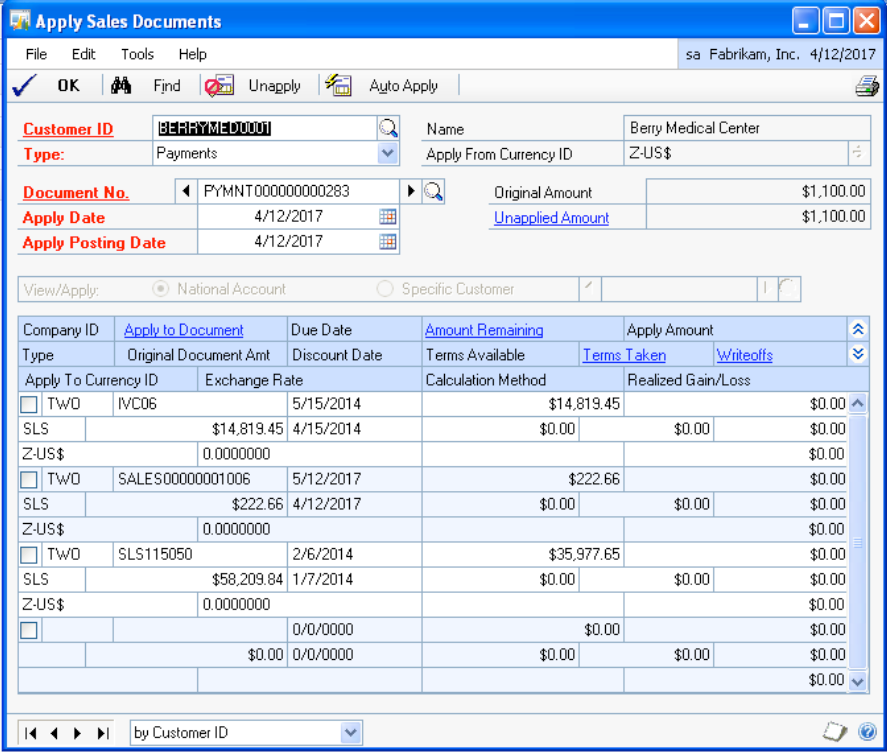
The bottom row in the window will contain a blank line. In the first text field either type in (or select from the lookup window) the company ID of the company that the cash document will be applied against. Once selected, a new window will pop‐up allowing you to select an individual transaction in the destination company.
Select the transaction(s) in the destination company you want to apply the cash against and then hit ‘Process’. You will get the following message:
Selecting ‘Continue’ will cause the debit and credit memo’s for the intercompany transaction. After the debit and credit memo’s have been created you will be returned to the ‘Apply Sales Documents’ window. Now in the window you can see that the appropriate fields have been filled in on the last line. The remaining balance will be applied to a non‐intercompany transaction which you can see is also marked off.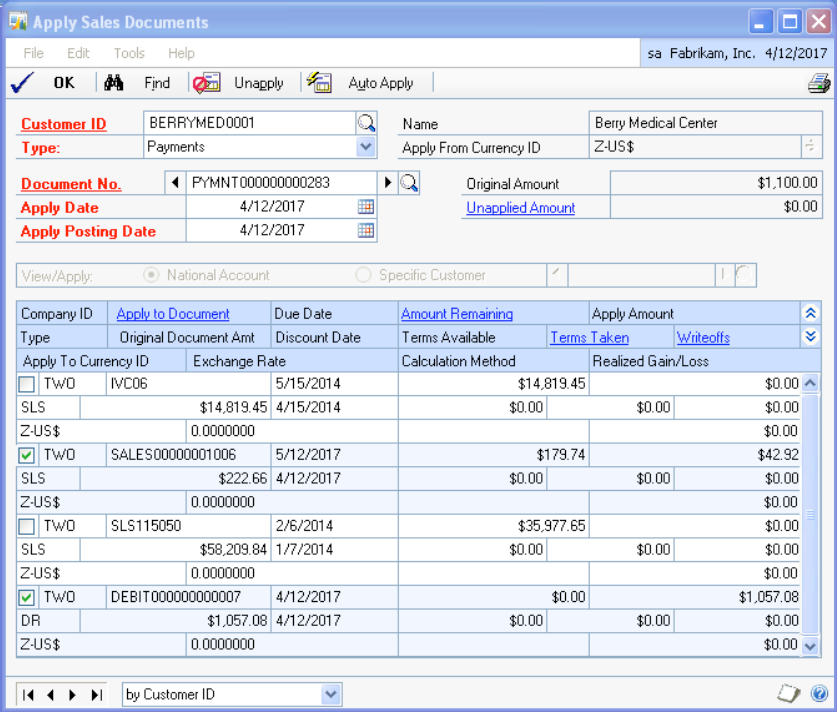
Now the cash receipt has been successfully applied to two transactions: one originating in the source company, and one originating in the destination company.
