The most common task performed when working with ABR is reconciling an account. This section will go more in- depth regarding the process.
Note: The initial setup of ABR, creating a “clean” system that is ready for use, is the key to successful reconciliations. Please refer to the Creating Beginning Balances for Bank Accounts section above, as the initial setup phase will need to be completed before starting a reconciliation on an account.
Extract GL Transactions
The first step in processing a reconciliation is to extract all of the GL transactions. Open the Extract Transactions window (Tools >> Routines >> Financial >> Advanced Bank Reconciliation >> Extract Transactions).
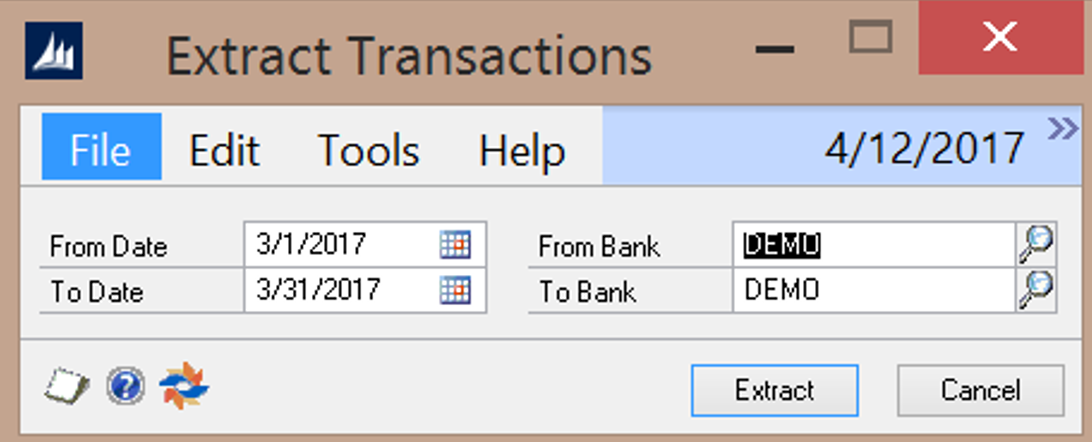
Enter the From and To Dates and select the Bank Account ID to be reconciled in the From Bank and To Bank fields. Click the Extract button to extract the GL transactions for the selected period. The Extract Transaction Log will print, indicating the number of transactions extracted and any exceptions.
Bank Statement Import
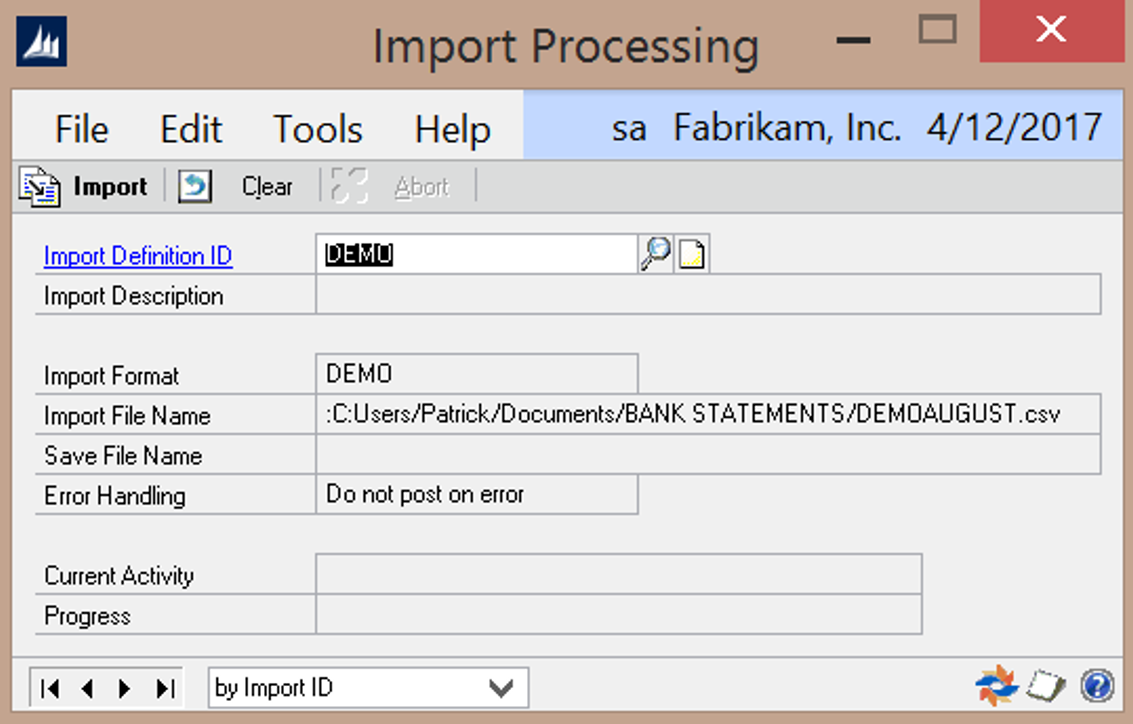
Bank transactions may be manually entered or imported into the Bank Statement Entry window. See Import Format
Setup and Import Maintenance Setup for setting up bank statement import definitions.
Open the Statement Import window (Tools >> Routines >> Financial >> Advanced Bank Reconciliation >> Statement Import) to import the bank statement transactions. Select the Import Definition relating to the bank account being imported and click on the Import button to import the statement.
Note: In order to import a statement, the bank statement file must be downloaded from the bank and saved to the location specified in the Import Processing window.
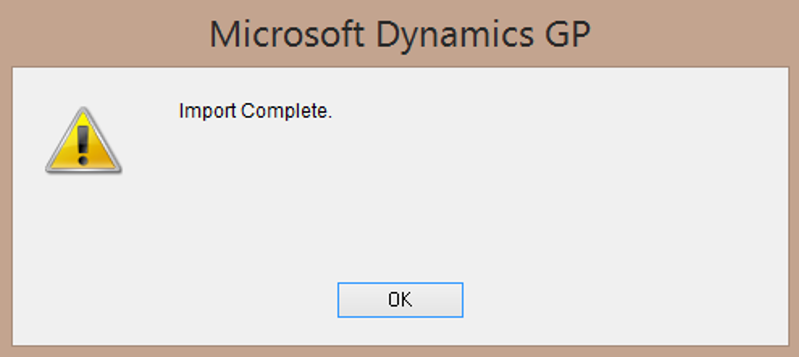
When the import is complete, a notification will display to indicate completion or that errors occurred. If errors occur, correct them and then re-run the statement import.
Reconcile
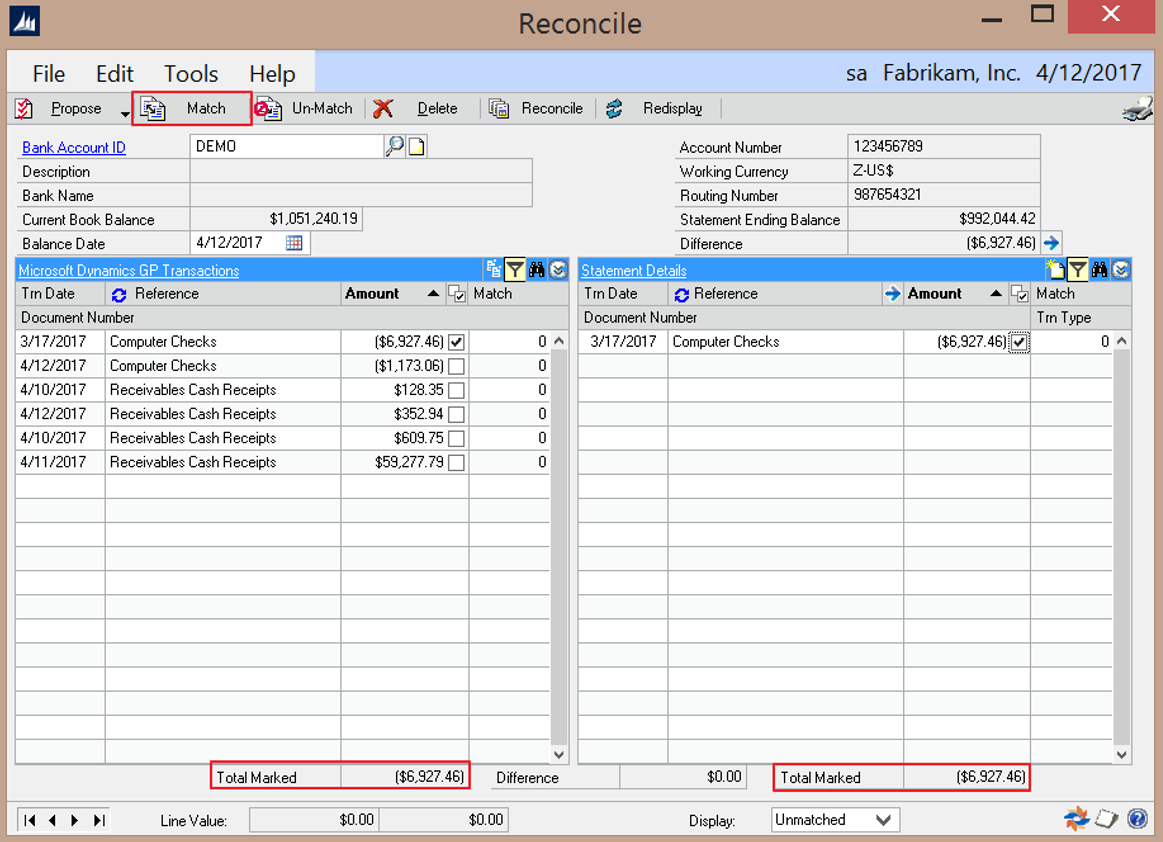
Launch the Reconcile window (Transaction >> Financial >> Advanced Bank Reconciliation >> Reconcile Bank Transactions) to begin the reconciliation process. Select the Bank Account ID and enter the Balance Date (ending date of the reconciliation).
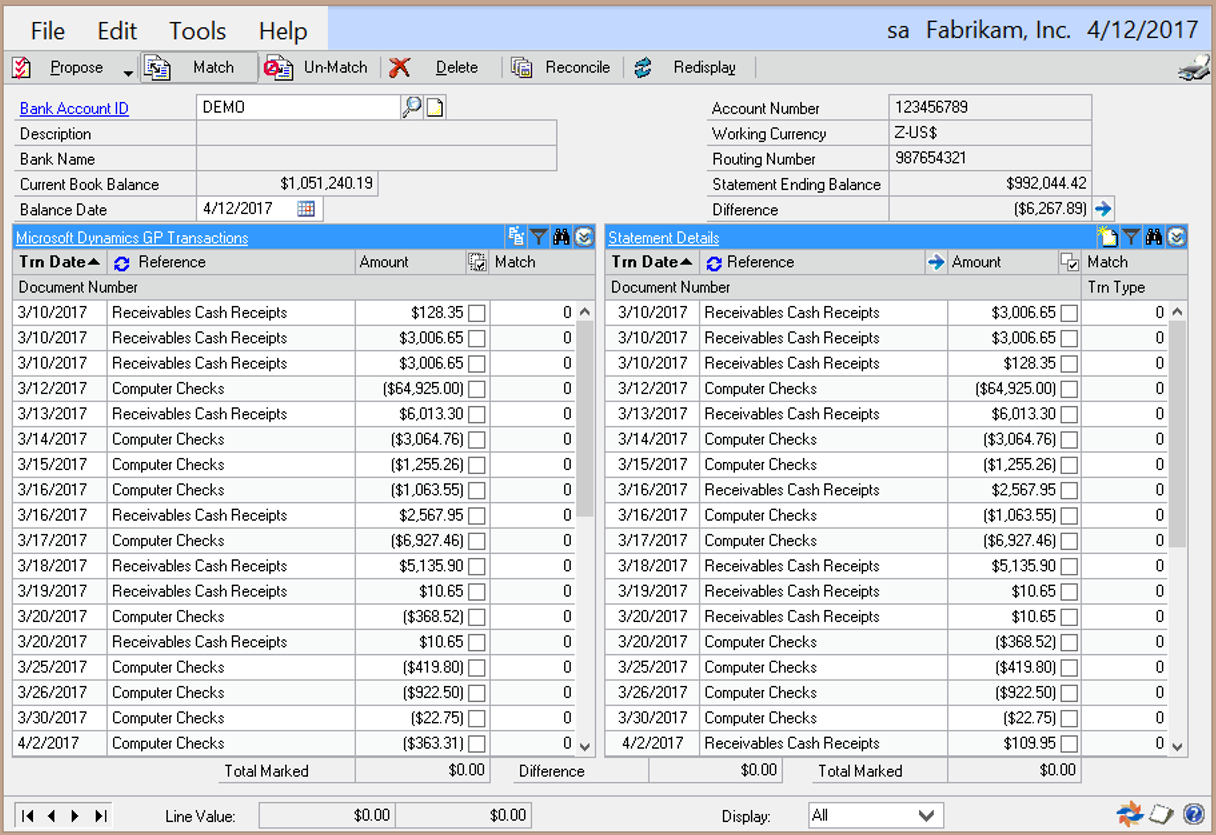
The grids will populate with the GL Transactions on the left, and the Bank Statement Transactions on the right. Review the transactions to verify that everything came in correctly, prior to reconciling. Verify the Current Book Balance and the Statement Ending Balance.
Now that all of the transactions are in the Reconcile window, click on the Propose button. This will match up the transactions based on amounts and apply any Reconcile Rules and/or tolerances that have been set. The Propose process saves a great deal of time during a reconciliation, as it should auto-match the majority of the transactions.
There may be transactions left after the Propose process that will need to be matched manually. To locate the unmatched transactions, select Unmatched from the Display dropdown box in the lower right of the screen. Now only the GL and Bank transactions that are not currently matched will be displayed.
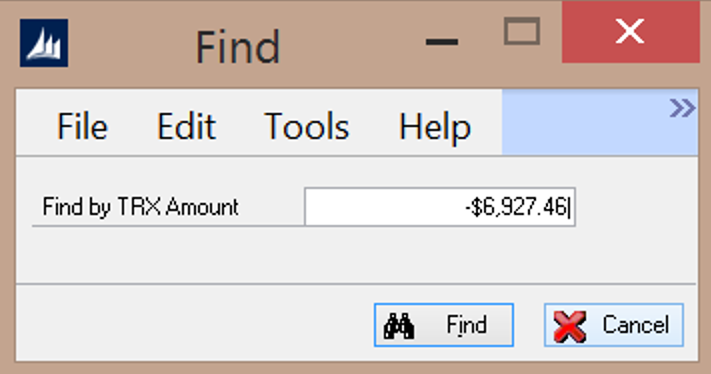
Use the Find button at the top of either the GL or Statement sides to search for matching items. To change the field used to search on, click the appropriate criteria.
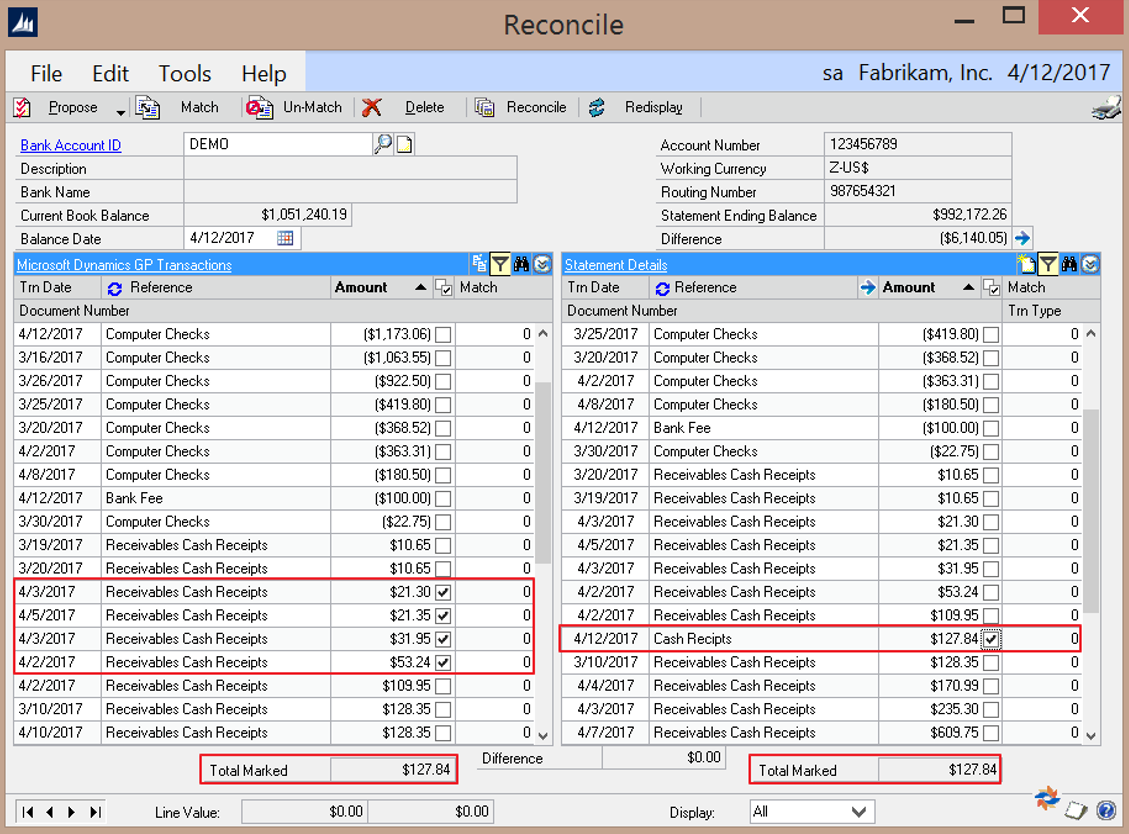
Once the GL transaction and the matching Bank transaction are located, check the checkboxes next to both transactions, verify that the Total Marked is the same on both the GP and Statement sides, and click the Match button.
Note: Multiple GL transactions can be matched to multiple bank transactions, as long as the Total Marked on each side are equal. This can be useful if one bank transaction represents multiple GL transactions or vice versa. A bank transaction can also be matched against another bank transaction as long as the selected transactions net to 0.00 The same applies to GL transactions as well.
Transactions should be matched one at a time. Do not start selecting all the bank transactions and then select all the matching GL transactions, as this will assign one match number for all the transactions. This can make checking your work and un-matching more difficult. For most cases, each bank transaction should have a unique match number.
Creating GL Transactions within the Reconcile window
It is possible that bank statement transactions may not match up with any existing GL transactions. This can happen if there are bank fees or interest income that were not entered in the GL prior to starting the bank reconciliation. These transactions can be entered during reconciliation. To do so, mark the bank statement transaction that represents the bank fees or un-entered GL transaction. Click the Create GL Trx button at the top of the bank transaction list.
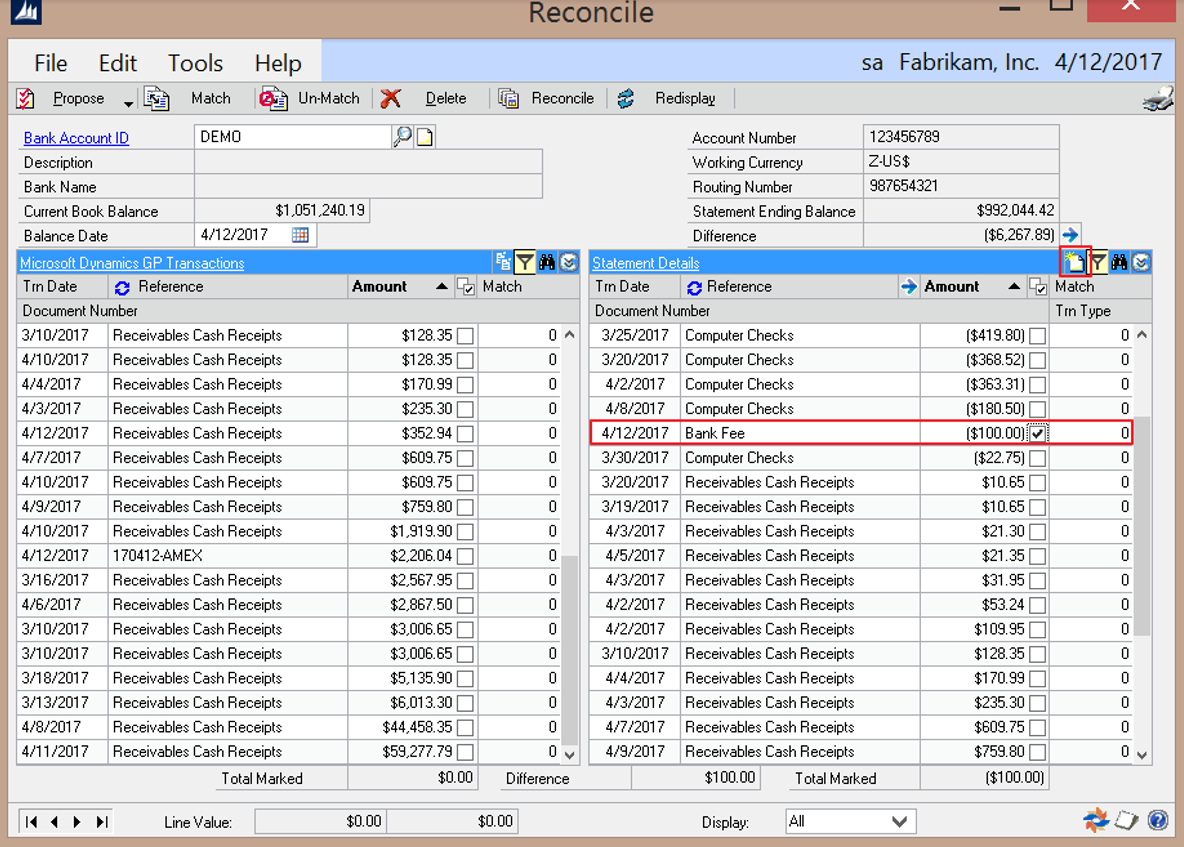
A Transaction Entry window will appear allowing for a GL transaction to be entered to balance the selected bank transaction.
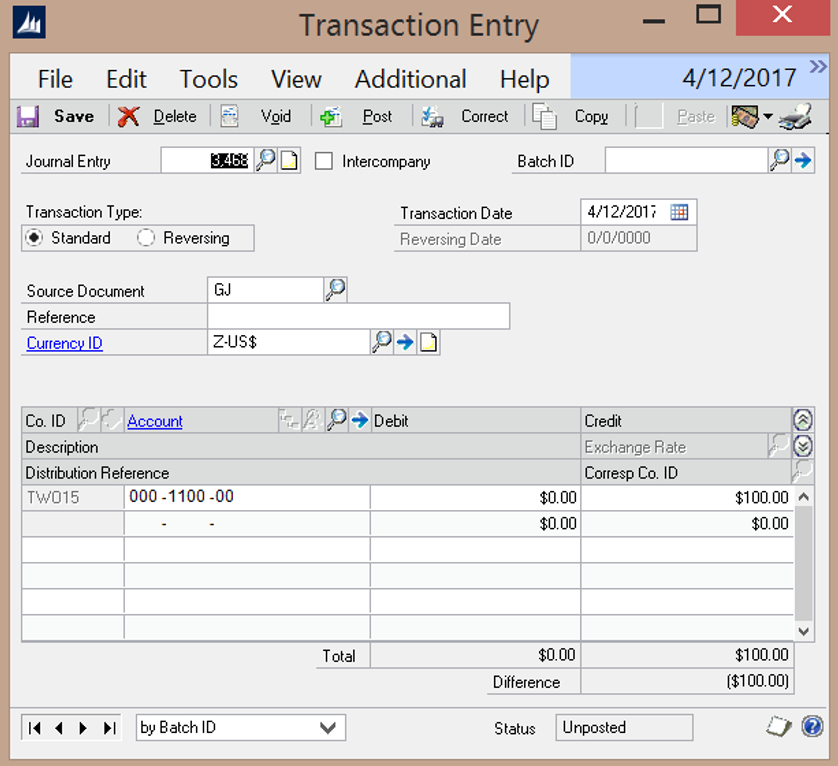
The Transaction Date and first distribution line will default with the current date and the main GL account associated to the Bank Account being reconciled. Enter in the balancing distribution account and a Reference for the transaction. Click Post and the transaction will post through the GL and automatically display in the Reconcile window. It will be marked to be matched with the selected bank transaction. Click the Match button to match the transactions and continue.
Consolidating Transactions
There may be cases where a single bank deposit transaction (right side) matches with multiple GL check deposits (left side). These may be manually matched as in the example below by manually checking the match box, as long as the Total Marked fields agree.
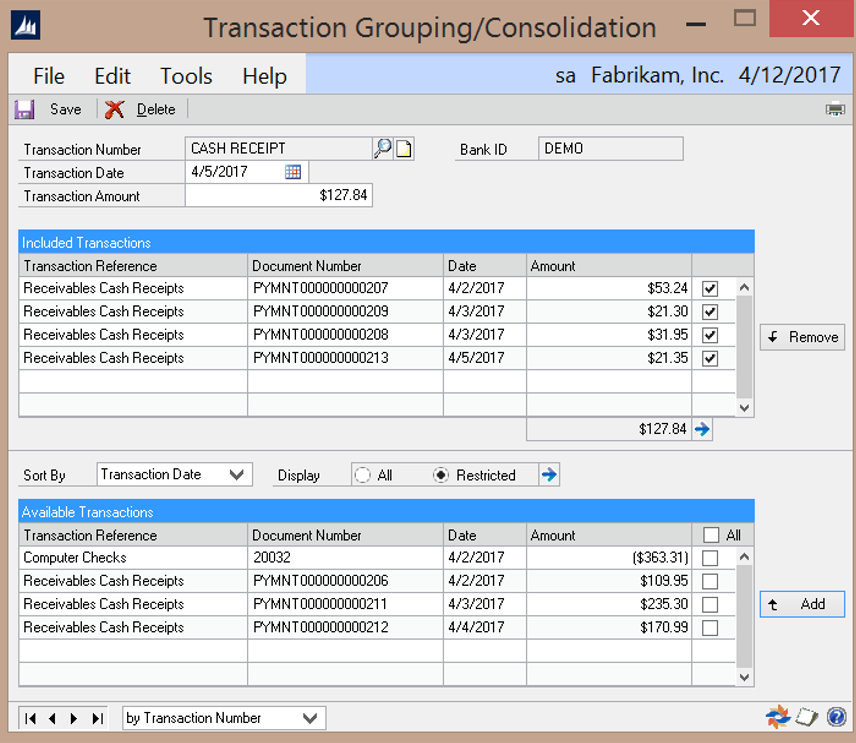
The Consolidate feature can also be used to group the GL check deposits into a single Deposit entry. To accomplish this, click on the Consolidate button (top right corner of GL side). This launches the Transaction Grouping/Consolidation window.
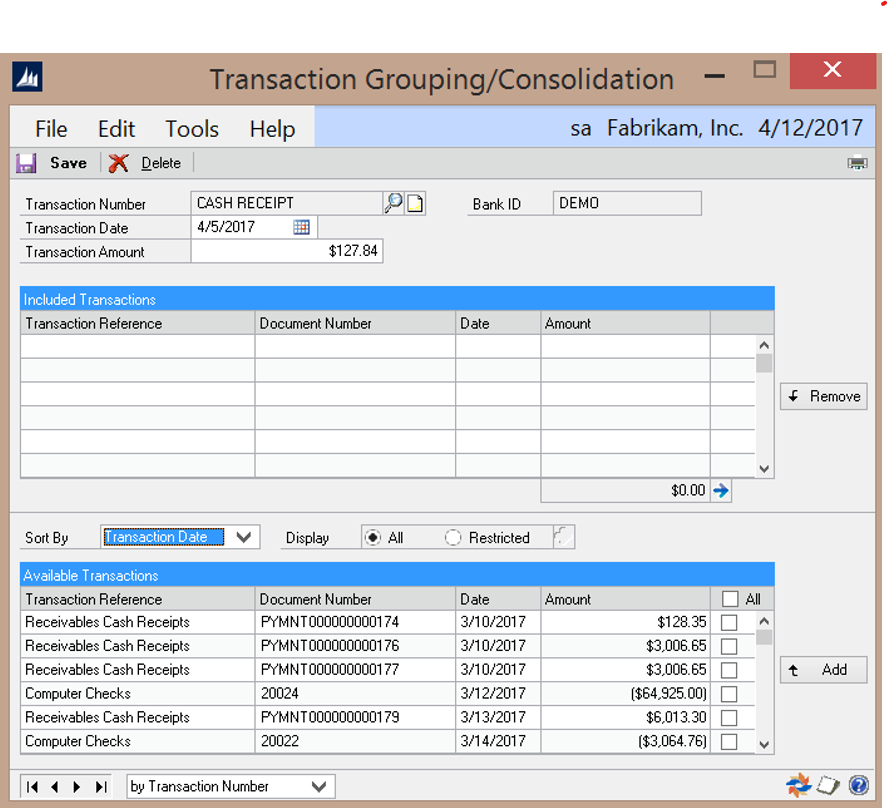
Enter a description (possibly a deposit slip number) in the Transaction Number field, and the date of the deposit in the Transaction Date field. Enter the deposit slip amount in the Transaction Amount field. Locate the GL transactions in the Available Transactions list (lower portion of the window), select them and click Add. This will move them to the Transactions Included section of the window to be included in the consolidation.
If the GL transactions are not easily identified, the Restricted display option can be used to limit the transactions included in the Available Transactions list. Clicking the expansion button next to the Restricted display option will launch the Range Selection window.
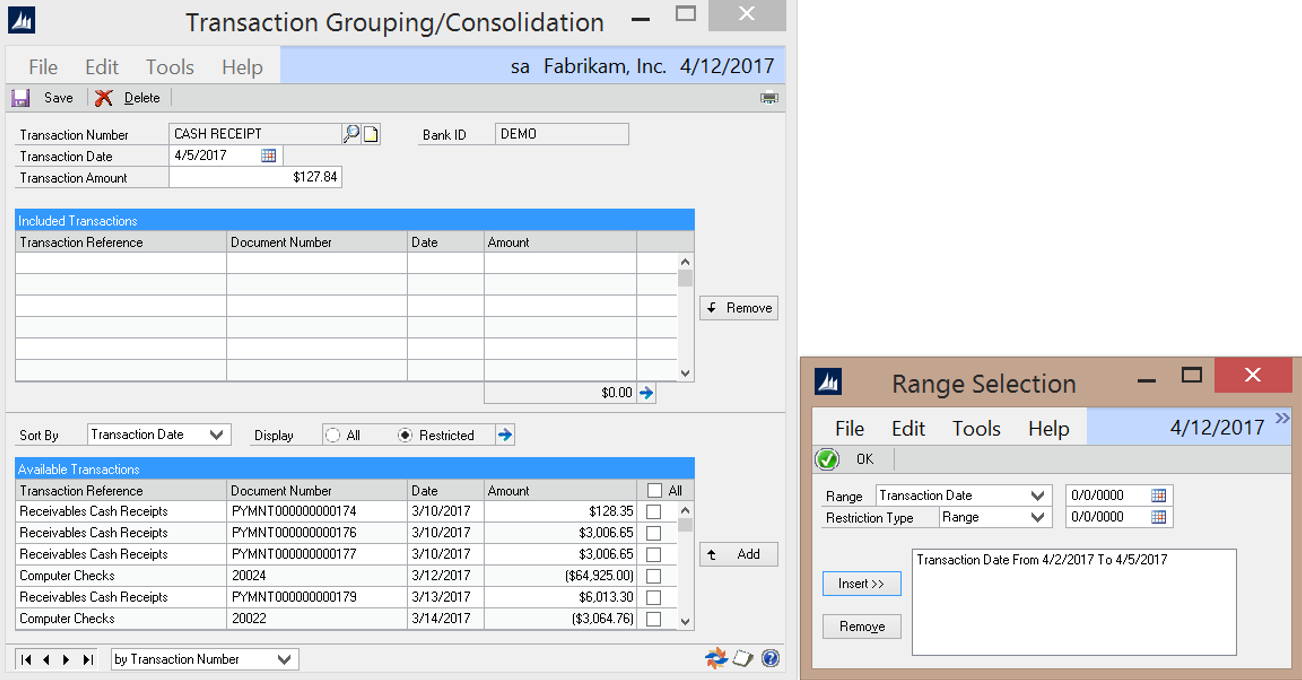
The Range Selection window allows the user to enter one or multiple criteria to use in filtering the transactions displayed in the Available Transactions grid (see details on Range Selection options on page 52). Apply the selected filter(s) by clicking on the OK button. This will close the Range Selection window and apply the filter.
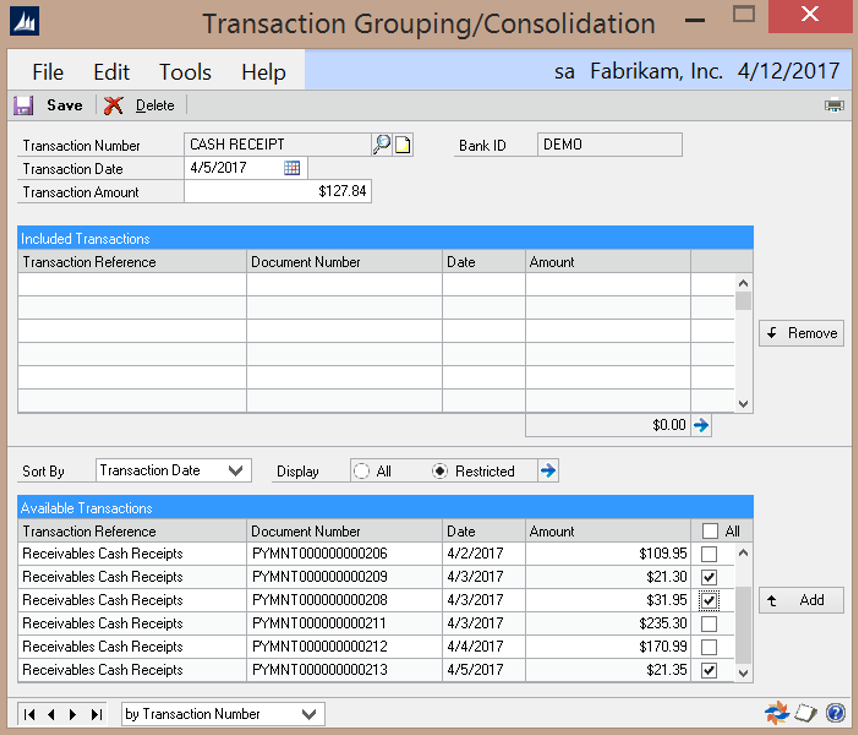
Select the appropriate transactions, or use the Mark All box, then click the Add button. This will move the transactions to the Transactions Included grid. Verify that the total Transactions Included is equal to the Transaction Amount, and click the Save button to create the consolidated transaction.
Close the window and go back to the Reconcile window. There will now be one GL entry with the reference being the Transaction Number and one bank transaction that are the deposits. Mark the deposit transactions on both sides and click the Match button to manually match the transactions.
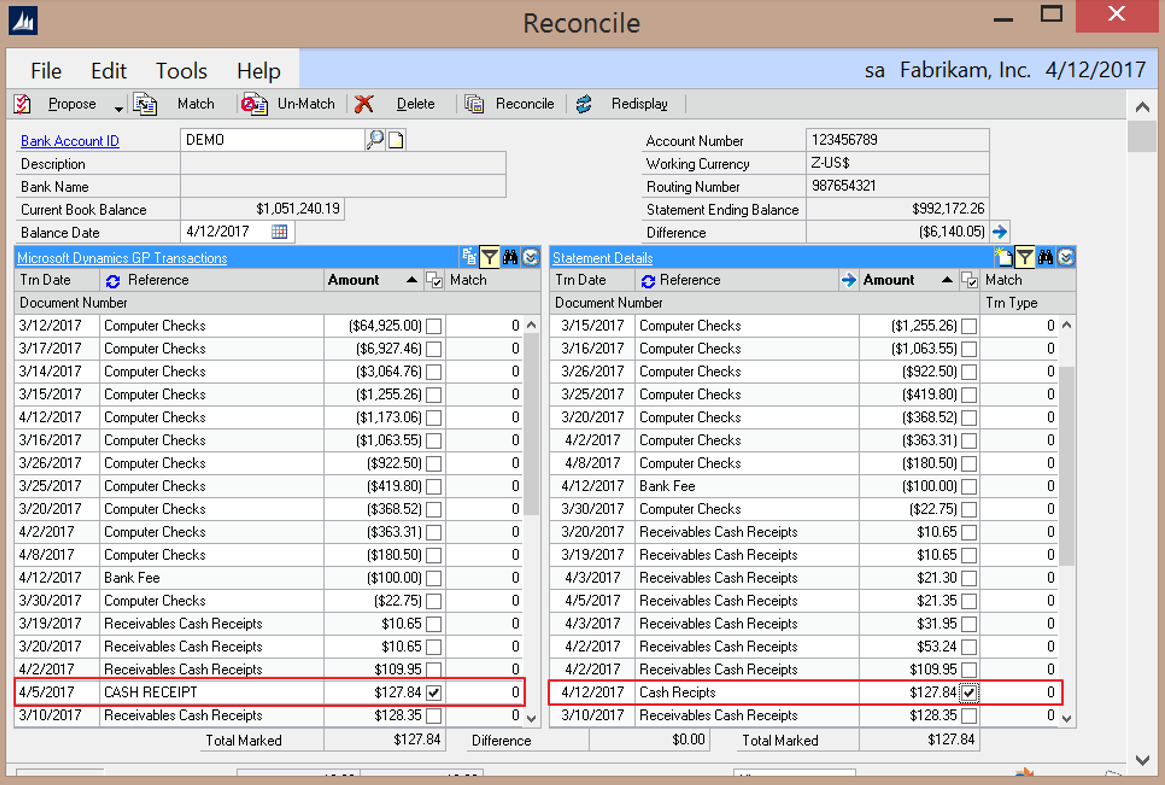
Once all of the transactions are matched, verify that the Difference field is zero, then click on the Reconcile button to reconcile your bank account. All the matched transactions will be removed from the Reconcile window and reports will be generated detailing the entire reconciliation.
