The Invoice Approvals module requires a module to be installed within Dynamics GP. This module is known as the eRequest GP Extensions. No Registration keys are required as the module checks the eRequest keys to ascertain if the module is registered. The Module does however require installing for each of the Dynamics GP companies that will be using the functionality.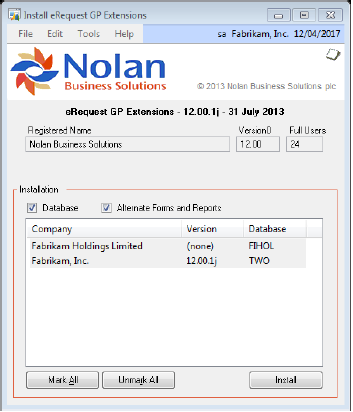
On installation of the eRequest GP Extensions module in Dynamics GP, the Invoice Approvals menu option in eRequest is activated.
In Tools >> Setup >> Purchasing >> eRequest, the module adds three new setup windows
eRequest GP Setup
eRequest Company Setup
Approval Rules
Approval User Access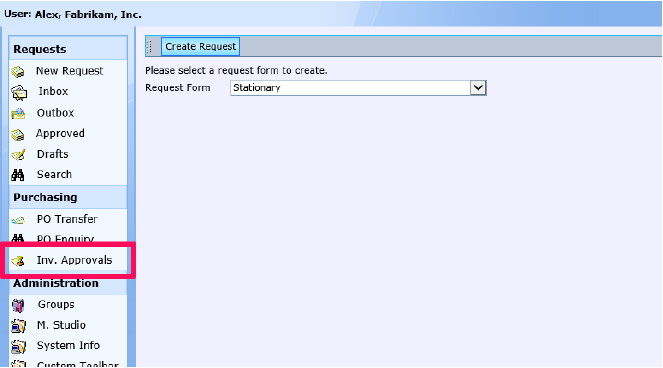
eRequest GP Setup
![]()

This window requires the entry of the database name used for eRequest. By default this is eRequest. The eRequest Setup options are stored at system level in the DYNAMICS.dbo.NCERX001 table. Options entered here therefore are set for all companies.
The eRequest Web Service URL is required when using the eRequest PO Details window. It allows eRequest to be opened in a web page from within Dynamics GP.
The ‘Move transactions to approved batch’ option allows unapproved invoices to be saved in separate, perhaps user-specific, batches for approval before posting. Once approved they are moved into an “APPROVED” batch. The Purchase Ledger users need only then to check and post the “Approved” batch as this contains the invoices that have been approved instead of looking through the individual batches to see which invoices are approved.
Whether an invoice is sent for approval or not may be set manually by the purchase ledger user on entering an invoice or may be set automatically by the system depending on rules. If you wish to use the Rules but require Invoice Approvals to warn the user if a rule is not found which applies to the invoice, tick the option ‘Warn when no default Approval Rule is found’.
Document Management – Select the Document Management system being used.
eRequest
Invoice Zoom URL – A button is active on the window which displays the status of a request line and the Purchase Invoice/Shipment details. When pressed, this button will call the URL specified in order to display scanned images of the invoice if scanning is used.
The following field tags can be included and will be substituted with the document values at runtime:
@ReceiptNumber, @VendorId, @POPRcptNum, @VendDocNum, @VoucherNum, @DBName
EASY
Invoice Zoom URL – A button is active on the window which displays the status of a request line and the Purchase Invoice/Shipment details. When pressed, this button will call the URL specified in order to display scanned images of the invoice if scanning is used.
The @Barcode field tags can be included and will be substituted with Barcode reference stored against the document.
Filestream
Endpoint URL – This is the Filestream Web Service Endpoint Url. A button is active on the window which displays the status of a request line and the Purchase Invoice/Shipment details. When pressed, this button will call the URL specified in order to display scanned images of the invoice if scanning is used.
Database – The Filestream Database.
User Name – Filestream User Name used for Web Services.
Password – Filestream login password used for Web Services.
Barcode Field – The Name of the field in Filestream that contains the barcode information when documents are indexed.
Document Management
Type – Select the Document Management Type
eRequest
Standard eRequest links to documents will be used.
Filestream
Custom integrations to Filestream will be enabled.
Barcode Type
Standard – Barcode printing will be performed using Standard GP.
Filestream Custom – Barcode printing will be done through a custom eRequest Client Application.
When this option is chosen a “Configure” button will be displayed. Click on the button to open the “Barcode Printing Configuration” window.
Barcode Printing Configuration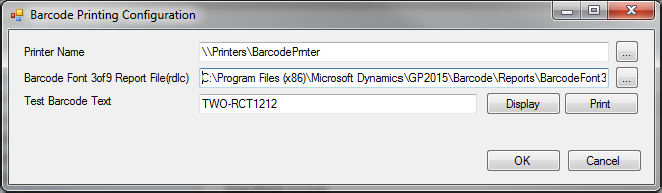
Printer Name – Select the name of the printer to send the barcode to.
Barcode Font 3of9 Report File (rdlc) – Select the Report Definition file for the barcode to be printed. The 3of9 font should be used for the barcode.
Test Barcode Text – Enter some text to be converted to a barcode. Clicking the “Display” button will open the Barcode Report Viewer window. From here the barcode can be printed or exported to Word, Excel or Pdf. Clicking on the “Print” button will send the generated barcode to the selected printer.
eRequest Company Setup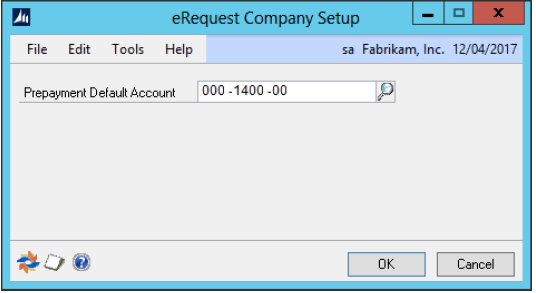
Approval Rules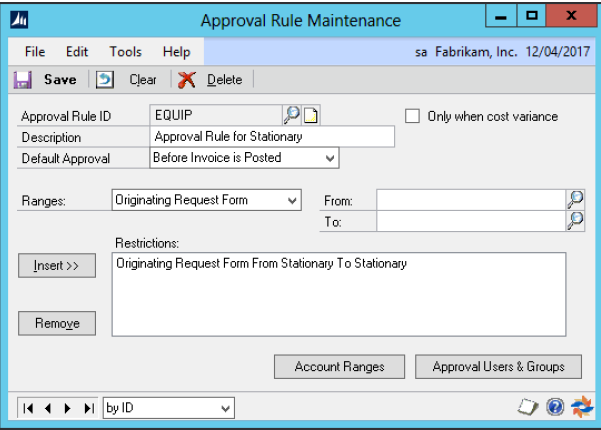
Approval Rules are evaluated when a user is entering an invoice in Purchase Order Processing Shipment/Invoice, Purchase Order Processing Invoice Entry or Payables Invoice Entry. An Approval rule specifies the conditions under which approval is required and by whom this approval is required.
Rules are evaluated in Name sequence so the naming of the rules can influence how the invoice will be routed. For example, if all invoices over £1,000 are to be routed to Finance but invoices from Supplier ABC is to be routed to the Project Manager, name the rules 1-Projects and 2-Finance with the related criteria and the 1-Projects rule will be evaluated before the 2-Finance rule sending the Supplier ABC Invoice to the Project Manager no matter what the value.
Approval Rule ID – This is the ID given to the Approval Rule. Approval Rules will be evaluated in Approval Rule Sequence so the naming convention may be used to define the order in which rules are applied.
Description – A brief description describing what the rule does.
Default Approval – Specifies which type of approval will be applied to invoices by this rule.
Only when cost variance – ticking this box will make the rule only apply for invoices where they are matched in Purchase Order Processing to a shipment and there is a cost variance.
Ranges – Using these ranges you can specify which invoices should be sent for approval.
You may enter a range of Invoice Amounts, Creditor IDs, Creditor Classes, Originating Request Forms, Originating Request Groups, Originating Request Users.
Enter the range and press the insert button in order to add the range into the Restrictions box. Select the range in the restrictions box and press the Remove button to remove the range.
Account Ranges – As well as the ranges above, Invoices may be sent for approval depending on the expense code applied on the invoice. This only applies to Purchase Ledger and Shipment/Invoice transaction types.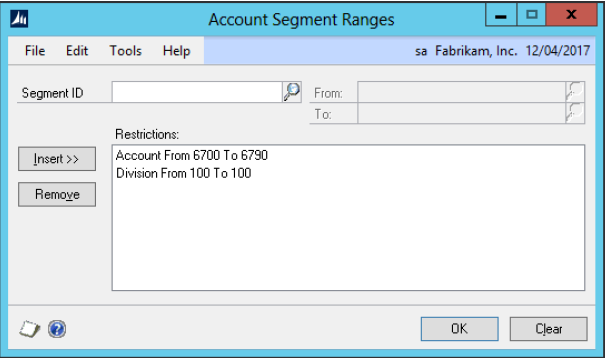
Approval Users and Groups – When the conditions on an Approval Rule are met for a specific Invoice, the Invoice will be marked as on-hold and the user or group specified as the default user or group will be set as the user or group from whom approval is required.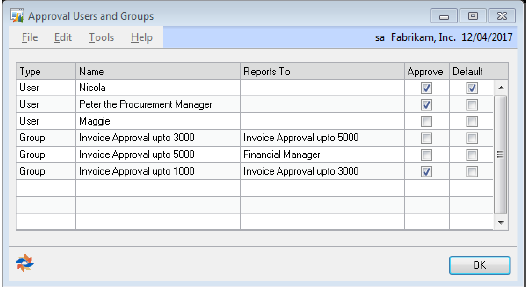
The Approval Users and Groups selection window displays all of the users and Groups setup in eRequest. You may select one or many users or groups who can approve the invoice but only one may be used as the default user or group.
If an invoice is sent to a user for approval, the user will be notified by email and once that user has approved the invoice in eRequest, the invoice will be marked as approved and taken off posting or pay hold.
If an invoice is sent to a group for approval, the users in the group will be notified by email and once the number of users specified in the group setup have approved the invoice in eRequest, the invoice will be marked as approved and taken off posting or pay hold if the invoice value is less than the “Complete Approval for amounts up to” value or it will be moved to the next level of workflow if it is more.
The selection of more than one user or group allows the Payables Ledger user the ability to override the default user or group with one of the other users or groups specified for the invoice relating to the specific rule during invoice entry.
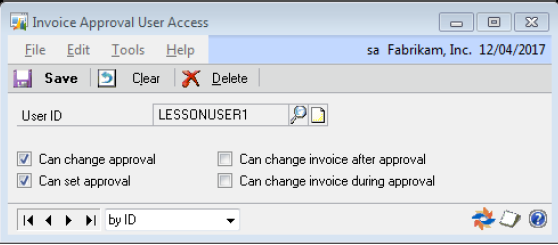
Approval User Access
The Approval User Access window defines the actions that the Payables Ledger user may make in relation to the invoice approvals. The access is defined by selecting the Dynamics GP user and specifying in terms of ticking the boxes whether the user may:
Can Set Approval – if no approval user is set via the approval rules, giving this access to the user will allow that user to allocate the invoice to a user or group for approval.
Can change approval – if the approver has been set via an approval rule, giving this access to the user will allow that user to override the rule and allocate the invoice to another user or group for approval.
Can change invoice during approval – once the invoice has been sent for approval, giving this access to the user will allow that user to change the invoice in Dynamics GP even though the user that is approving the invoice may not be aware of the change occurring. If this option is not set, the invoice in Dynamics GP will be set as read only for the user.
Can change invoice after approval – once the invoice has been sent for approval and approved, giving this access to the user will allow that user to change the invoice in Dynamics GP even though the user that has approved the invoice may not be aware of the change occurring. If this option is not set, the invoice in Dynamics GP will be set as read only for the user.