To install, follow these steps. The process will need to be repeated on all Workstations on which Microsoft Dynamics GP is installed. However, if Microsoft Dynamics GP is run from a network (DYNAMICS.dic is installed in a network location), you will only need to install to that location.
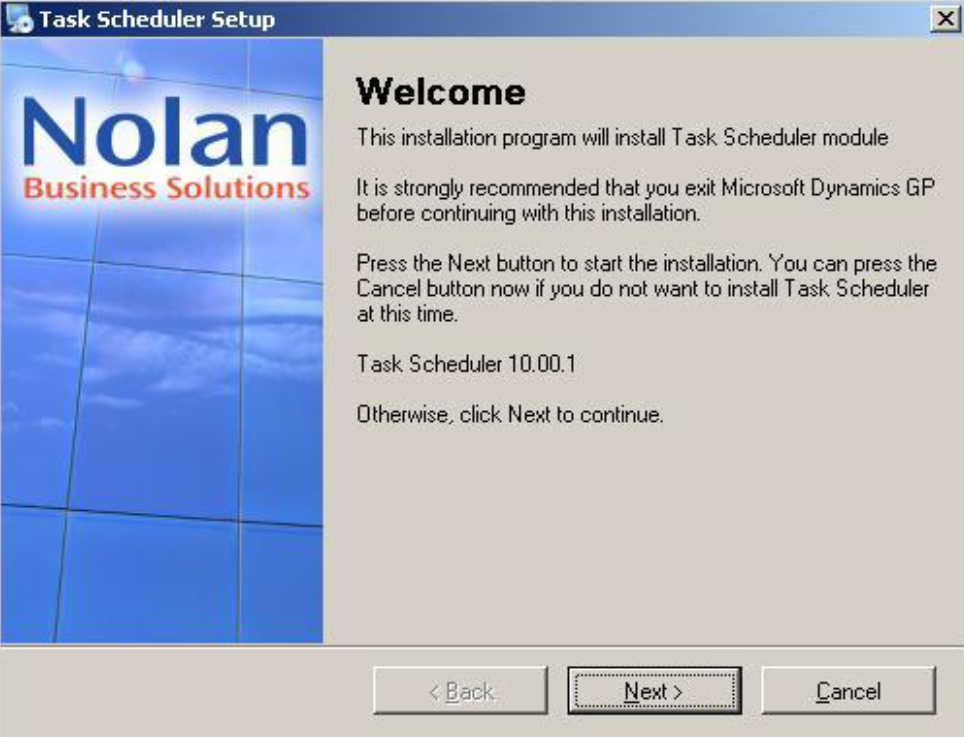
- Run the install application you have been supplied with. The install application is a standard Installer Wizard. The install application should be run with Administrator privileges e.g. “Right click the install application and select Run as Administrator”. The install will ask for the Microsoft Dynamics GP directory and will install a chunk file into this directory. Follow the on-screen instructions to complete the install.
![]()
- Once the install has completed, run Microsoft Dynamics GP to load the chunk file. Microsoft Dynamics should be run with Administrator privileges e.g. “Right click the Microsoft Dynamics shortcut and select Run as Administrator”.
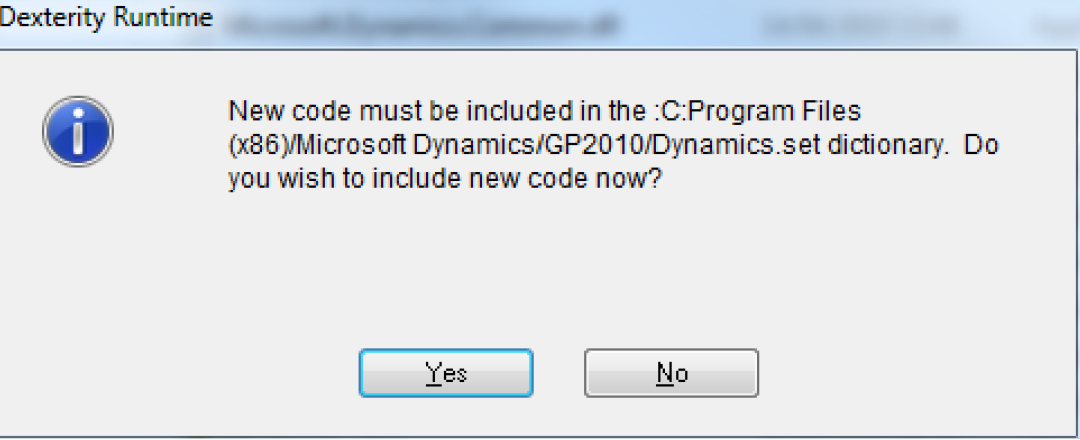
- During the start-up of Microsoft Dynamics a you will be prompted to include new code. Select “Yes” to include the new code.
![]()
- Login to Microsoft Dynamics using the “sa” user.
- A shortcut will now have been added to the Shortcut bar to allow the installation to be completed. From the Shortcut bar select “Nolan Computers > Install Task Scheduler”. The installation window will be opened.
![]()
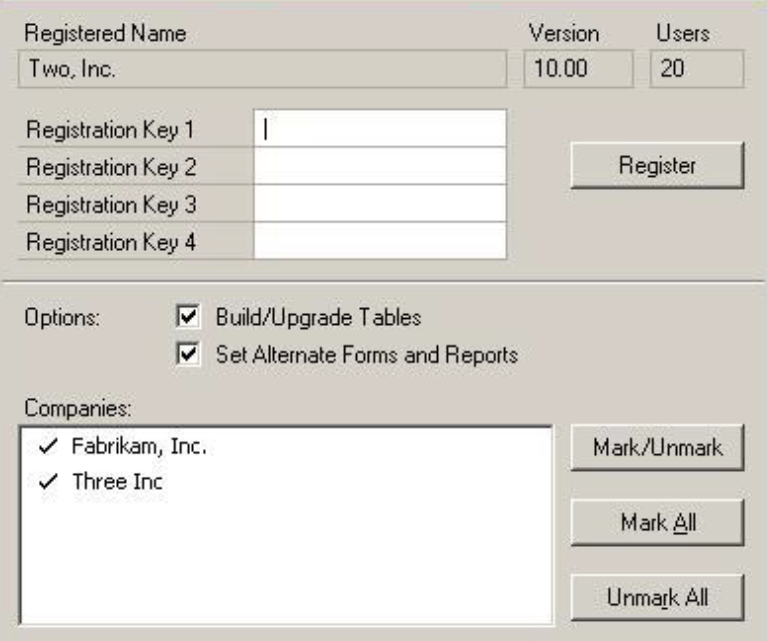
- To register the application, enter your Registration Keys in the fields provided (You will have received these Registration Keys with the purchase of the application). This is required to enable use of the application in companies other than the Test Company.
- Click on the “Register” button, you will receive a message indicating that Registration was successful.7. Choose which Companies to install the application for by highlighting them in the Installation List and clicking the “Mark/Unmark” button or by using the “Mark All” and “Unmark All” buttons.
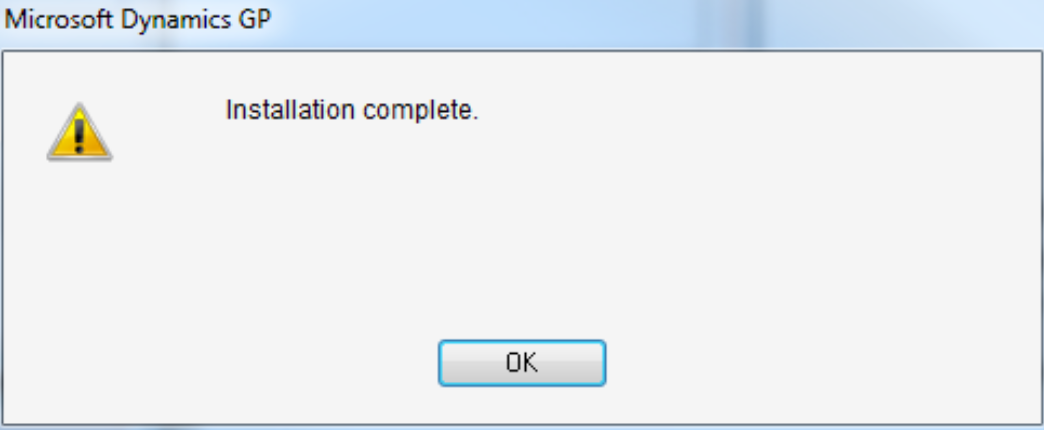
- Click the “Install” button. You will be notified when the installation is complete.
![]()
- The installation shortcut can now be removed from the shortcut bar.