Introduction
To further speed up the reconciliation process you can create Auto-gen Templates. These templates are used when the Auto-Generate Button is clicked in the Reconcile Window. Journal Entries, Advanced Intercompany Journal Entries and Customer Payments can be created using Auto-Gen Templates.
Auto-Generate is useful when you have Recurring Bank Statement Lines for transactions that have Not Yet been entered into NetSuite. Auto-Generate Templates can find Unmatched Bank Statement Lines and create the NetSuite Transaction, providing a Match ID Number. This prevents users from having to enter transactions into NetSuite, running the extract process, and matching against the Bank Statement Line each time.
Auto-Gen Templates can be used for Any type of Reoccurring Bank Transaction that you want Automatically posted in NetSuite using Journal Entry, Customer Payment, or Intercompany Journal.
To access Auto-Gen Templates go to ABR -> ABR Setup -> Auto-Gen Templates.
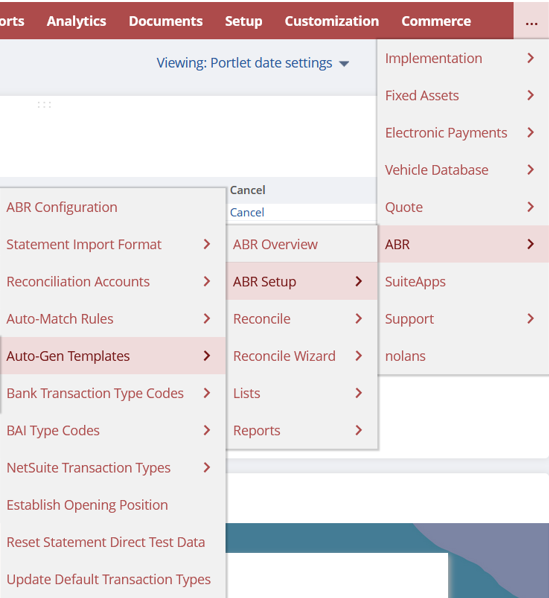
Now click New ABR Auto-Gen Template
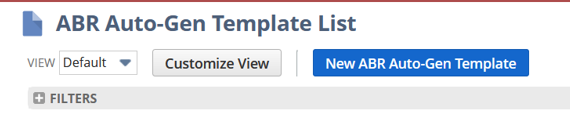
Now fill in the relevant Fields to create your custom Template.

TIP: There are two places from which you can access Auto-Generate templates. Either through the menu navigation as seen above or through the reconcile window as seen below.

Creating Auto-Gen Templates
To go about creating your new Auto-Gen Template, do the following. Either navigate to ABR -> ABR Setup -> Auto-Gen Templates -> New. Or via the Reconcile Window. Both options are shown above.
To create a New Template from the Reconcile Window, click the Match box beside the Bank Transaction you wish to create a Template for.

Then click the New Template button below the Bank Statement Transactions Sub-Tab.

General Setup Fields
This section will go through in detail the different Fields available when creating your new Auto-Gen Template.

Description – Here you will enter the name of the Template, e.g., Phone expense.
Reconcile Account – Here you must select the relevant Reconcile Account. This Restricts a rule to that specific account. Auto-Gen Templates MUST be linked to a Reconcile Account and Cannot be applied as a Global rule.
Priority – Decide here the Sequence in which Templates are processed. Lower Values (1) will have Higher priority.
Target Account – This field must be selected if there are multiple Target accounts attached to the selected Reconcile Account to drive the appropriate subsidiary and field selections.
For more guidance on the following fields please reach out to Nolan support: Approved, Approved By.
Matching Rules

Transaction Type – Input a Value of the Bank Transaction Type. This Restricts the results to entries with the Same Transaction Type. The Value MUST Match the Bank Value EXACTLY.
Statement Reference Text – In this box, enter Text you wish to Search for in the Statement Line. Text and spacing must match exactly. You can leave this field Blank to Ignore the reference.
Statement Reference Match Option – The options in this drop-down menu indicate how to Match the Statement Reference Text. The options are listed below.
- Exactly – To match Every Word in the Statement Reference Text.
- Starts With – To match with the First Word in the Statement Reference Text.
- Contains – To match with ANY Statement Line containing the desired word in the Statement Reference Text.
Statement Transaction Number – Enter Text in this box you wish to search for in the Bank Statement Line Transaction Number. You can leave this Blank.
Statement Transaction No. Match Option – This indicates how to Match the Statement Transaction Number. The options available are the same as the Statement Reference Match Option.
Transaction Amount – This is the Value to Match the Amount on the Statement Line. Leave this Blank to Ignore the Transaction Amount, therefore it will match ANY Value.
Transaction Amount Variance – This is the Amount by which the Statement Line Amount and the Template Amount may Differ. This will allow you to create a Range for the amount. You can leave this Blank for an Exact match.
Day of Month – Enter a Date in this box to Match the date on the Statement Line. You can leave this Blank to match with ANY Date.
Day of Month Variance – This is the number of Days by which the Statement Line Date and the Template Day or Month may Differ. This will allow you create a Range for the date. You can leave this Blank if a date is not required.
Generation Rules

Posting Type – Here, select the Posting Type you wish to be created from this Template.
Nominal Account – This is the Account to be used as the Balancing Entry on the generated transaction. This is the General Ledger Account that will Balance the Cash Entry.
Transaction Memo – Text entered here will appear in the Memo Field on the generated transaction.
Entity Name – Select from the List to post Against a Specific Entity.
Department - Select from the List to post Against a Specific Department.
Class - Select from the List to post Against a Specific Class.
Location - Select from the List to post Against a Specific Location.
Apply Transaction Memo To All Lines – Tick this box to Apply the Transaction Memo to ALL Lines on the generated transaction.
Allocation and Entity Search
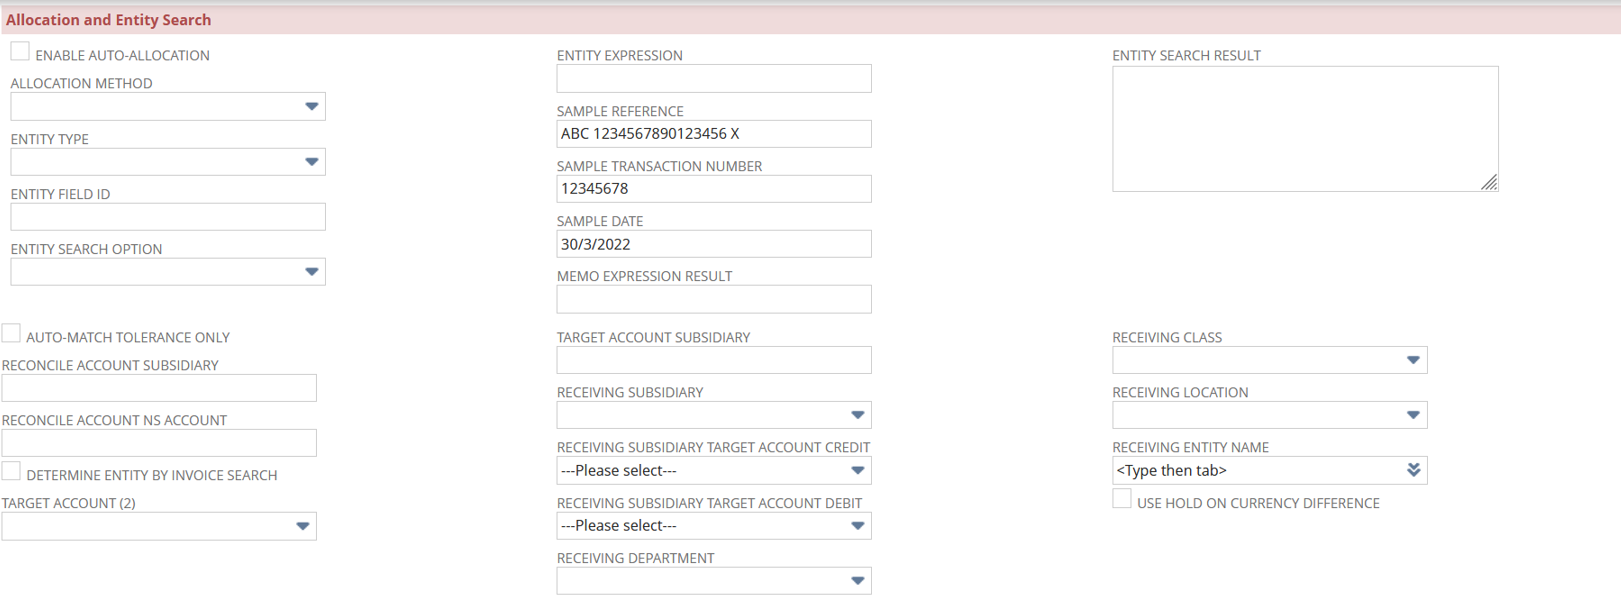
Auto-Allocation allows for Customer Payment Receipts to be allocated against Outstanding Invoices. To use Auto-Allocation remember to select Payment as the Posting Type.
Enable Auto-Allocation – Tick this box to enable Auto-Allocation of the transaction against Outstanding Balances for the chosen Entity.
Allocation Method – If Enable Auto-Allocation is ticked, the Allocation Method determines how it will Prioritise allocation against Invoices. The options are below.
Oldest First
Newest First
Match By Reference
Match By Amount
Account Distributions

ABR Auto-Gen Templates can be set up if one Bank Line Item needs to be Split into multiple NetSuite General Ledger Accounts based on Fixed Percentages.
Field Sourcing

Field Sourcing Entries will populate Values for those Additional Fields at Body and Column Level.
Field Sourcing allows the user to populate Customised Fields with transactions.
Advanced Intercompany Journal Entry (IC JE)
The Advanced IC JE Settings allow you to book Entries into two companies on one Transaction.
Under Generation Rules, select the Advanced IC JE option as the Posting and Enter the Receiving Nominal Account directly into the Nominal Account field.
Under Advanced IC JE Settings Enter two Intercompany Control Accounts into the “BANK SUBSIDIARY DUE TO/FROM” and “RECEIVING SUBSIDIARY DUE TO/FROM” fields.
The following fields are discontinued and exist on the form only to help with any migration issues and should not be used; “Receiving Entity Name”, “Receiving Subsidiary Target Account Credit Field” and the “Receiving Subsidiary Target Account Debit Field”.
Advanced Intercompany has the option to use “Representing Entities”. This means that when posting from one subsidiary to another, as well as recording the “movement” in the financial ledger via the “Due To/From” accounts, you also have a “customer & supplier” entity for each subsidiary. These entities can be manually configured on the subsidiary or can be auto generated.
When Representing Entities are not used, or are auto generated, there is no need to provide values for these on the template. If Representing Entities are not defined on the Subsidiary and are being used, then the values can be provided on the template
